Users need to know what are keyframes in Alight Motion for making dynamic animations using multiple motion effects during editing. However, Alight Motion is an advanced video and animation editing Android phone App. It comprises outstanding editing feature Keyframes for advanced content creators.
It is a much-needed application for editors who want to edit animated, meaningful content and other graphics and visual effects. However, Alight Motion provides the cherry on top of qualitative features with unlimited access.
Keyframes in Alight Motion
Alight motion users who are used to editing their videos using this application must know about these new features. If you are editing your video for the first time, it’s a deliberate feature. The Keyframe feature is used to make Professional videos with unique content. Thus, as a professional video maker, you can analyze the content and outlook refinement using this feature and before it.
Often, your created videos show some error about adding the keyframes to your video. You can overcome this error and get the inimitable response on your videos by utilizing a keyframe.
However, animators have the keyframe software for adding visual effects during animation-making. It works as a primary frame. So you cannot add the effects of the move, zoom in & zoom out, and various others on your videos. Without this impressive keyframe feature, your video will not exhibit a successful effect addition.
Download: Alight Motion PRO + Mod (FREE PRO FEATURES)
The challenge is adding or making videos using the Alight motion keyframes feature. If you are a new user of the application, no worries; here is the complete guide about It.
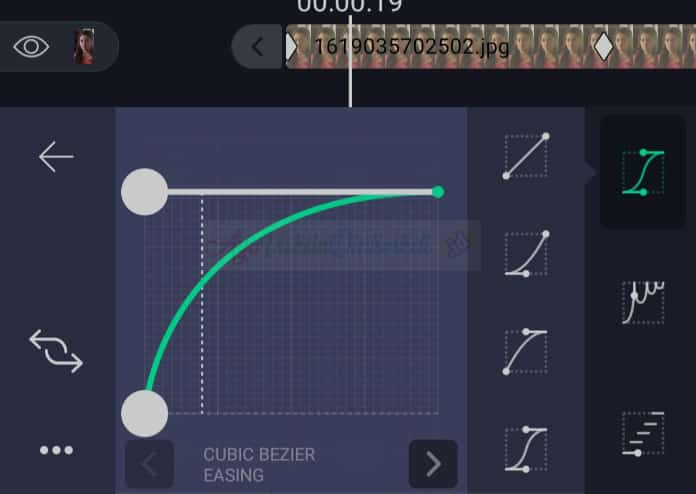
Make Smooth Transitions by Using Interpolation
The interpolation options for keyframes are accessible in Alight Motion to establish fluid transitions. You can analyze various interpolation types, including bezier, linear, or auto bezier, to make your animation acceleration and deceleration. It enhances the overall professionalism and polish of your animations.
Users are able to fearlessly experience and iterate with appropriate keyframes to acquire their preferred animation effect. Meanwhile, you can play with values, easing types, and different timings to upgrade your animation. You can ensure that these effects entirely meet your creativity.
When you incorporate the keyframes in Alight Motion may initially require practice because proficiency in your editing comes with experience and time. You must engage yourself in learning from tutorials, continuous experimentation, and practice consistently to refine your skills. So, with time, you can master your creative skills and enhance the visual effects with keyframes in your edited work.
Therefore, three major forms of Alight Motion Keyframes are:

How to create a video using Keyframes in Alight Motion?
Using outstanding features on your favorite application is an amazing thing. You can easily accomplish your task, get fun and stay safe from paid software. Hence, to use it, one must undergo the step-by-step process:
Install the Alight Motion App
The forefront represents the download link of Alight Motion because it’s the foremost step. You must enable the application on your device where you want to edit the video. Once you have installed and updated the application with the latest features.
Download Alight Motion Effects Pack
Add a new Project
Click on the menu settings from three doted option and start your new Project. You are going to create your new Project. So you can follow our instructions and recommended Project’s requirements for doing the new Project.

Project management with new features
The interface will direct you to customize the newly added Project.
Set your Project’s name, resolution, background colors, and framerates. Ensure that you have organized your Project’s basic settings, which can be reused anytime else.
This step may save you time if you’re working on the same Project for different content. You can open the Project, update the new necessities, and deliver your order without wasting time.
Update other videos or images
Here, alight Motion gives diverse options after specification settings. However, you may look through the variety of image editing options.
The noteworthy advantage of this application is that you have a multifold choice of images or videos simultaneously. You can upgrade your editing skills as well.
Enable the keyframes
In this case, the editors import the video or photos onto their projects. There is no option to add effects or edit again until the new feature Keyframes is endured.
Thus, you have to add it to make the best video, and Alight Motion asks many times to enable this option.
Suppose you are making an animation about walking across the screen. Now, you can set the keyframe effect of the character, an element standing outside on the ground (screen). Another character appears at the final destination by keyframes.
Then, between these two selected keyframes, you can generate the ground effects. Alight Motion allows the walking effect by video animation option on your Project. Ultimately, your video is generated using different effects simultaneously.
Keyframes formation
Once the video animation is generated, you can preview it. This complete video creation and analysis step is compulsory. Sometimes, something is missing from the keyframe effect or not appropriately placed. You may redo it consciously, and you can repeat the process as well. However, follow the same steps for different video editing projects.
Echo Effect in Alight Motion
Keyframes in Alight Motion permit you to create multiple echoes on different layers of your animation and videos. So, these can be:
Seconds:
It sets temporal distance for the furthest echo. So its range can be Default: 0.5 for -60 to 60.
Count:
It specifies echoes between the current time and the final echo. Hence, it comes as Default: 1 and range 0 – 20.
Alpha:
It represents the opacity of the final echo, and it’s gradually applied for fading effects. It’s conveniently accessible in Default: 1 and range 0 – 1.
Composite:
Users can manage it if echoes are on top of the layer or drawn behind. So it’s managed as:
Users are proficient in editing video by a layer animation with keyframes and then applying the Echo Keyframes effects. For your optimal visualization, you may set the position as play-head near the layer’s midpoint on your timeline before adjusting properties on your animation.
Afterward, you can modify Count and Seconds as required in your project and then accomplish fine-tune results by adjusting the remaining echoes Alpha and Composite.
Echo Keyframes smoothly collaborate with both aspects, such as defined clarity and implicitly creating keyframes. Hence these keyframes work with effects like Pulse Size and Oscillate, even on animated groups.
You must know that it doesn’t affect the raster content of a layer but impacts perfectly computed properties and other animations. You need to adjust your layer’s time or apply any re-timing group for visible and reliable visibility of your applied echoes.
How to use Keyframes on iOS?
It is an Android operate-able application. We legally offer the opportunity to download Alight-Motion on your PC, iOS, iPad, and other Windows devices. The process of video editing on iOS depends on the Android emulator here. Android emulator Bluestacks allows you to get keyframe access on your PC and iPad as well.
If you are exhausted from using the small screens, you can transfer your Video projects to your PC or other enlarged screens. Alight motions are switchable on your Computer or laptop.
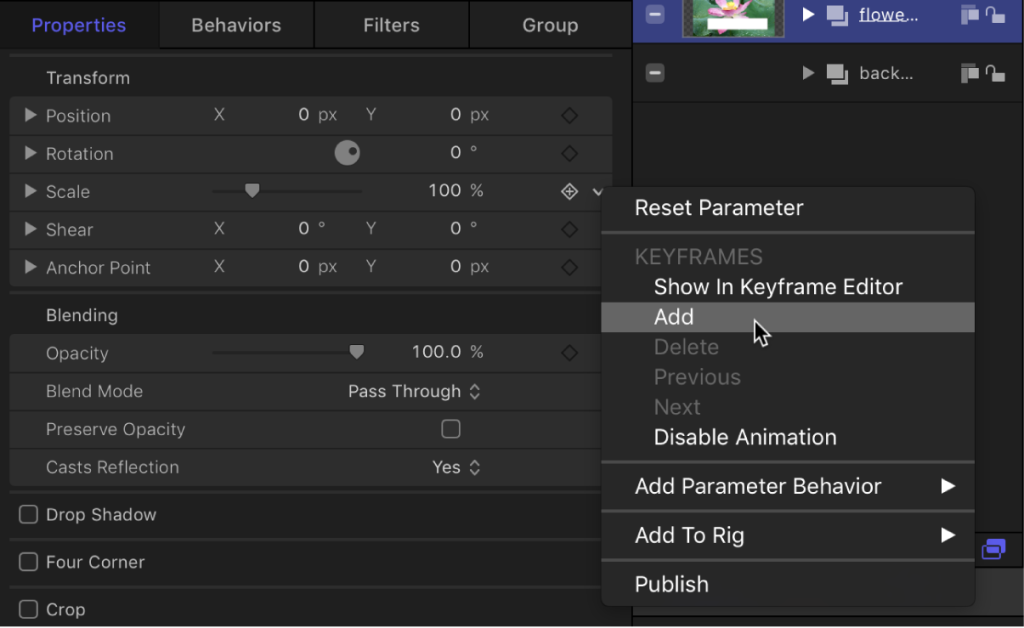
Creation and removal of Keyframes
Alight Motion permits to addition and removal of the effects of Keyframes at any time. You can customize your projects with the best placement and time-management elements. Let’s open your project and enable the keyframes on a specific part by tapping a button. After using in specific portion, you can cut it off from animation. Regarding this, click on the keyframe effect, then press the Delete button. It’s all done within seconds.
Copy & Paste the Keyframes into the Alight Motion
Once the editors have used this feature on videos and want to repeat it in further projects. Then, alight motion turns them into the count of copy and paste the desired effects. You need to perform these steps:
Advanced Keyframe Techniques in Alight Motion
When you have learned the fundamental aspects of Alight motion keyframes, you can understand more sophisticated methods to make attractive animations. We’ve provided some unique tips and techniques to add uniqueness to your journey:

Tips for Effectively Applying Keyframes
If you want to maximize your editing potential, you need to apply different advanced tips for using keyframes in your videos. Hence, these are a few important tips for beginners and advanced editors:
FAQs
Can I modify Keyframes after video creation?
Yes, Alight Motion allows you to adjust the value and positions of Keyframes at any part of your video. You can choose these effects, perform experiments, and modify them in the Properties panel to add uniqueness to your project.
How do I remove Keyframe effects in Alight Motion?
You may choose these keyframes on your project timeline in the App and then press the key ‘Delete’ from the keyboard. Your keyframes will be eliminated entirely.
Does Alight Motion permit copying and pasting the Keyframes?
Yes, this application permits you to copy and paste different effects of keyframes on different parts/layers of your video. To do so, press the right button and navigate to Keyframe (s) > Copy Keyframe > Move your relevant section of the project > Right Click > Paste your copied Keyframe (Source).
What are the advantages of applying keyframes in animation?
Summary
Alight Motion App adds an advanced and straightforward feature of Keyframes. It offers massive effects for filmmaking with a professional look. The keyframe effect is user-friendly and very responsive to use. However, Keyframes’ engaging content can make your movies neat, unique, and excellent.